|
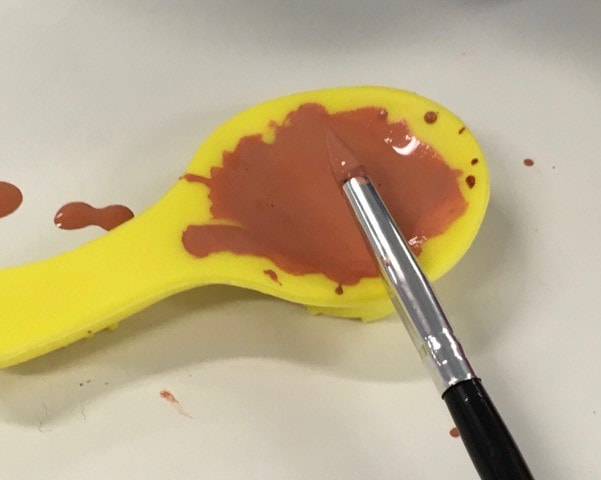
October 28 saw a very special day with Robin Tait, from Endangered Heritage. The subject was GOLD! We learnt so much about working with gold leaf lifting it carefully from a cushion, putting through a sieve for a wonderful effect called Zarafshan. The base for the gold was gum arabic - with or without indigo paint in it. Then we learnt how to make shell gold, and went through vast amounts of gold leaf to produce a very small amount of shell gold! No wonder it is so expensive! We produced some examples of work with gold too, ending up with painting a fine line in shell gold. This was done on top of a wash of very dilute shell gold. The ideas that came from this workshop are spinning around in our heads. Thanks Robin for a great day. Many thanks to Cherrie Grant for the photos.
0 Comments
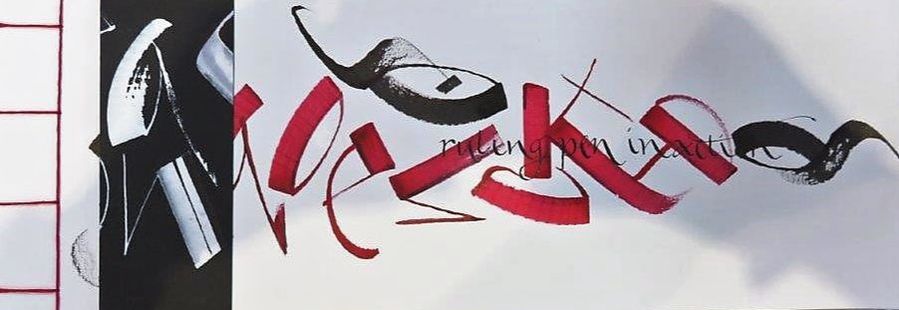
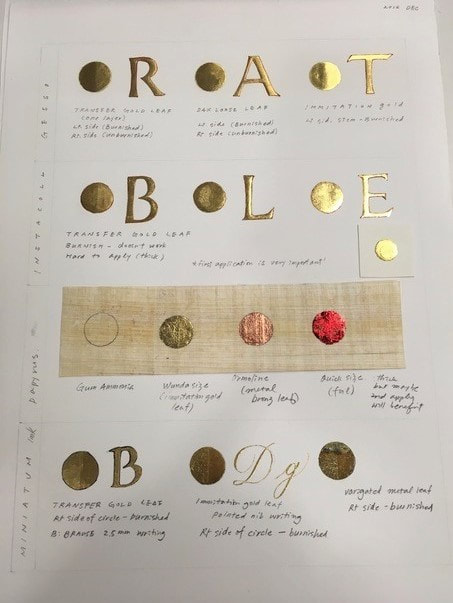
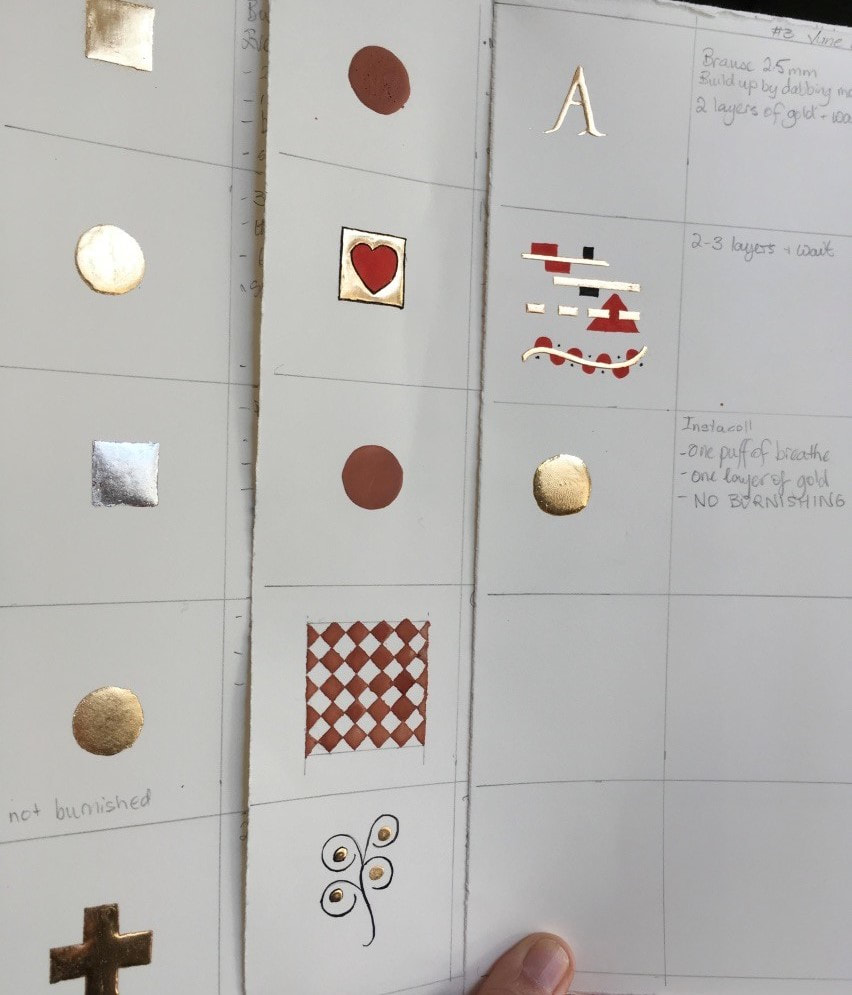
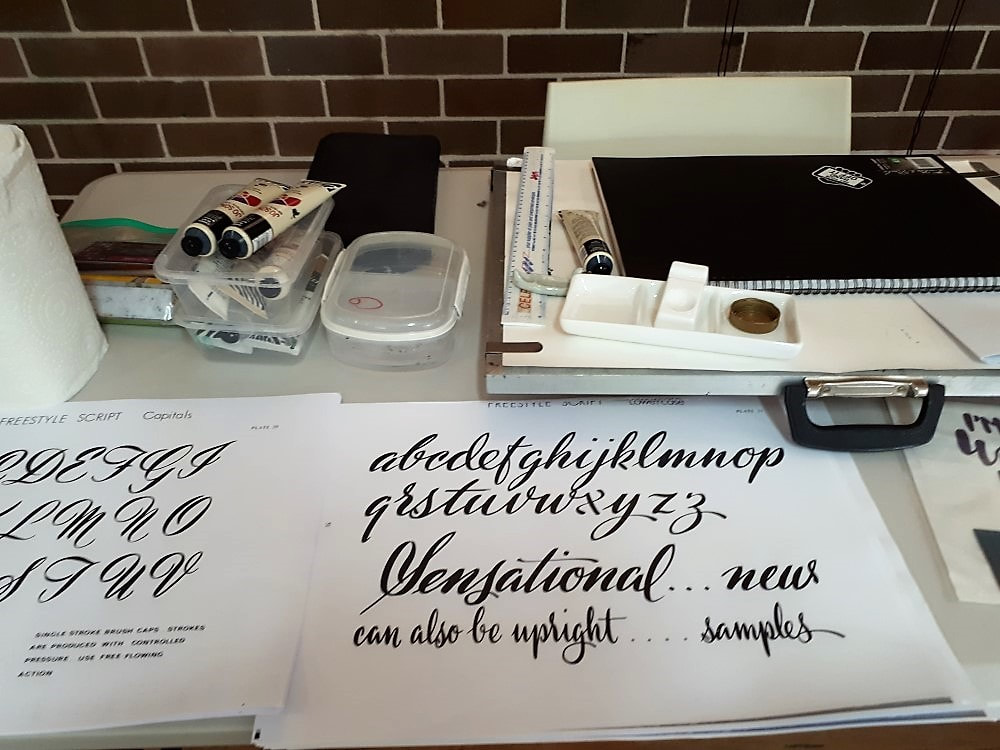
Our recent workshop was the Ups and Downs of Embossing led by Lyndell Dobbs. Embossing is the process of creating either raised relief images and designs in paper. Participants experimented with both hand made templates and manufactured templates. The AGM of the Society was held on Sunday and then afterward we were treated to a very interesting workshop led by Narelle Jones. Playing with Pastels proved to be very popular with some lovely worked produced. A very interesting workshop was held on Sunday at the Urambi Village Hall. The workshop, run by Pam Kemp, was on gestural writing. Pam describes it a combining the discipline of a classical script with a little variation of forms to become a more contemporary piece of art work. It was certainly an interesting challenge to most of the participants. Our June workshop was writing on "Anything But Paper". The tutor was Allira Middlebrook, whose specialty is wedding calligraphy. She led us through writing on tracing paper covers to personalise chocolate bars, writing in gold pen on coasters, (that are now fashionable as place names at tables in weddings), and writing in white paint pen on tarracotta flower pots. Even broken pots came in useful! Quite a variety. I think you'll see the results were quite impressive. Allira's script is a style of modern calligraphy which is a built-up drawn brush style. How lucky was I to get a place in the Calligraphy Society of Tasmania’s workshop Midas’s Hand – A touch of Gold Touch with Gyounghee (Hee) Lee from Melbourne as our tutor. It was with some trepidation that I set off for Hobart for a weekend working with GOLD. I have always found any form of bling temperamental when wanting to incorporate it into my calligraphy but I was determined to learn more about it in the hope that it would lead to more consistent results in the future. I could have added Attention to Detail as a subtitle for this report, as this was the catch-cry throughout the weekend. Attention to detail starting with the right temperature and humidity in your workroom, the best ingredients for making your own gesso, the careful application of the gesso, the careful scraping and burnishing of the gesso and that was before we even got any gold near our work. We learnt about the many different varieties and qualities of gold leaf and how best to work with this expensive but beautiful material. Who knew that it is possible to get up to 20 layers of gold onto the gesso if all goes well. Over the two days we made a number of exemplar sheets, annotating as we went along, noting what worked and what didn’t and how to apply gesso with a variety of different tools (silicon brush, nib, ruling pen). We learnt how to correct mistakes and still be able to get great results once the gold was laid and burnished. Hee was a superb tutor who spent individual time with everyone to help us all produce some amazing results. She generously shared her knowledge of the history, chemistry and practical application of gold to her own work with us as she took us along the journey towards more successful illumination of our own calligraphic pieces. Thank you to the Calligraphy Society of Tasmania. It was a pleasure to meet a group of like-minded calligraphers and spend time with them in their home town learning new skills and techniques. A huge thank you also to Hee whose knowledge and ability to share it was amazing. Now for the hard part – trying to make it all work in my little room!!! Narelle Jones April 2018 workshop with Jenni Cole Eleven participants left their pens, ink and good papers at home and came along with cartridge paper (for practice) and acrylic paints. The aim of the workshop was to complete two small projects, the raw materials for which were supplied by Jenni. The first was script on coloured card which the participants were invited to take this home and turn into an A 3 size document folder. The second project was script on a handsome piece of spotted gum, to be used as an outdoor sign. Jenni’s demo made it look easy. But it proved to be difficult. Many of us blamed our failures on our brush or our cheap paint. And Jenni agreed that a really good brush (sable / ox is the best you can get) and really good paint (Jo Sonja’s is nice and creamy) will assist to make uniform and consistent shapes. The correct technique was to use pressure to make the thick strokes and then ease off the pressure and twist the brush slightly to make the tapered thin strokes. For some participants, working with the paper on an angle helped to get a consistent diagonal slope. Wetting the brush before dipping it into the paint, using a light grip, holding the writing hand high and not resting on the paper were other useful tips. Next we practiced upper case and then lower case in a script Jenni called “Free Style Script” which looks a little like a brush version of copperplate – but more relaxed in look and feel. The capitals are complex and flowery, whilst the lower case proved generally simpler and easy to master. We could cheat a bit by painting over draft penciled letters. The script has no defined stroke order, and advanced scribes may use a flowing ‘running writing’ technique whilst beginners usually favour building up each letter with several strokes. Everyone went home with the materials for their document folder and a wooden sign appropriate for a workshop, garden shed, vegie patch or car space. All it needed was a slurp of varnish to make it waterproof. Thank you Jenni for the workshop, the materials and for the lovely little ceramic brush rest she gave to each participant. We barely even noticed that in reality it was a chop stick rest. A lovely gift! And I need hardly mention that the afternoon surpassed our usual standard. Judith Wood One of our members was lucky enough to attend a workshop by John Mathieson run by the Victorian Calligraphy Society. The workshop was entitled Travel Sketching. It is a workshop that proved to be very complimentary to calligraphy. In April I had the opportunity to participate in a 3-day workshop in Melbourne (organised by the Calligraphy Society of Victoria) learning about Travel Sketching for use when keeping a travel diary. The workshop was presented by John Mathieson, a South Australian artist who teaches drawing and watercolour classes across Australia and New Zealand. The aim of the workshop was to learn the essential skills for sketching in pen and watercolour so we could quickly and easily record holiday experiences while travelling. What a delight!!! We learnt about perspective, horizon lines, shadows and reflection as well as sketching people, chooks and sheeps. We sketched and painted a variety of photos presented to us and I was totally astounded to discover I had skills I never knew existed within me. John was a fabulous teacher who encouraged and supported our efforts and certainly made us laugh all through my adventure into the world of travel diary sketching. Narelle Jones 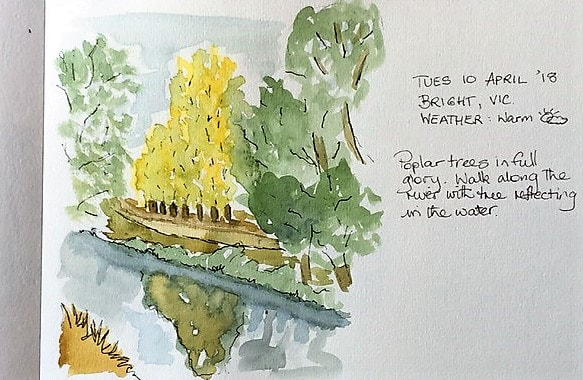 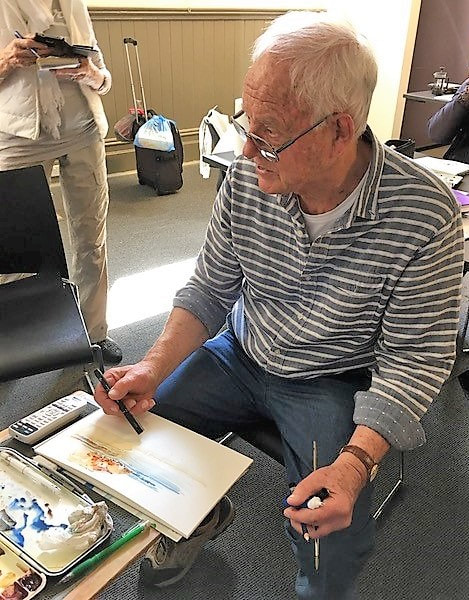 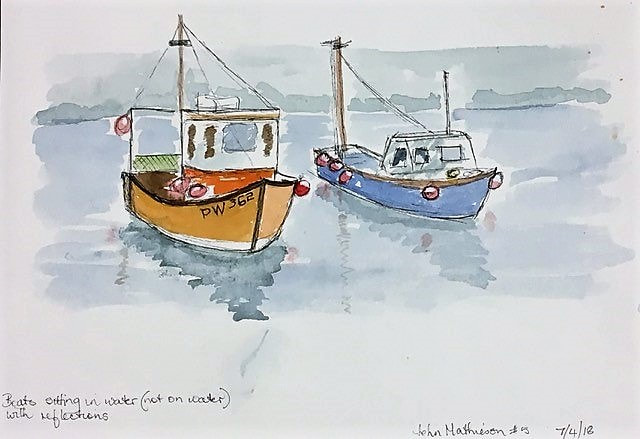 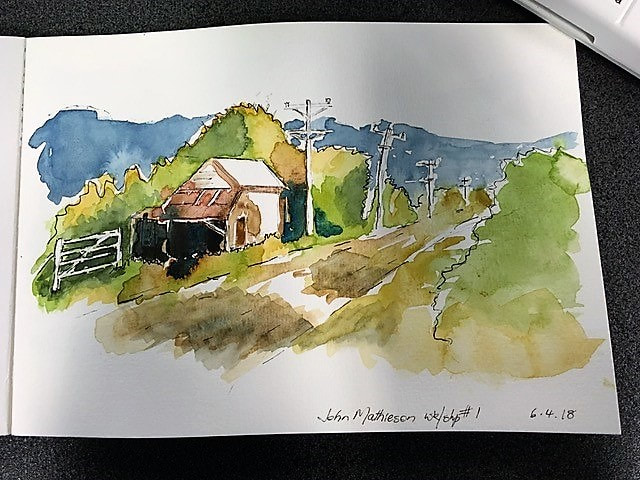 The Canberra Calligraphy Society has just completed another successful exhibition. Well done to all exhibitors and an especial thanks to Sue Quayle and committee who worked hard to make it possible. I am currently in Tallinn (Estonia) and yesterday visited an exhibition of works by students of the Tallinn School of Calligraphy, on display in one of the towers of the old city wall There were some very impressive works, and I thought perhaps some members of the Canberra Calligraphy Society might be interested to see a few samples. Unfortunately, because of the lighting etc, it was hard to get very good photos, but I managed to take a few which give an idea. The Tallinn School of Calligraphy operates from October to May (at these northern latitudes everyone understandably wants to make the most of their summer days by spending them outdoors) – further information on their website at https://labora.ee/calligraphy.school) Anne Laisk 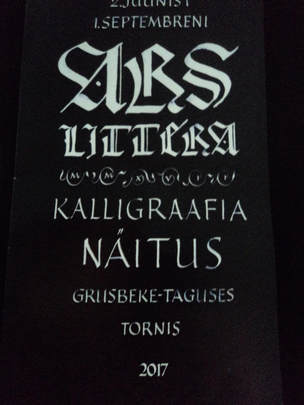 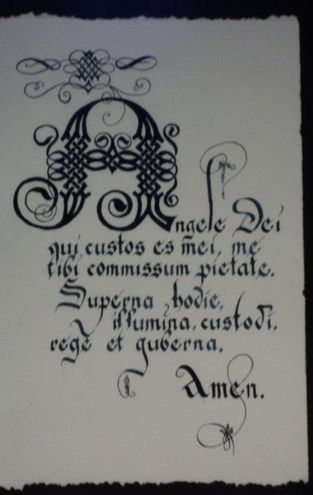 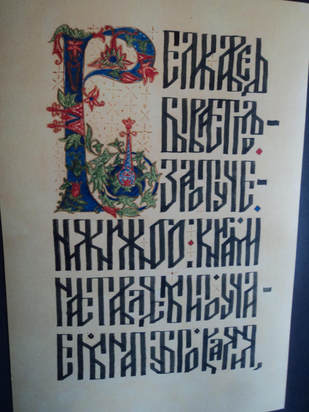 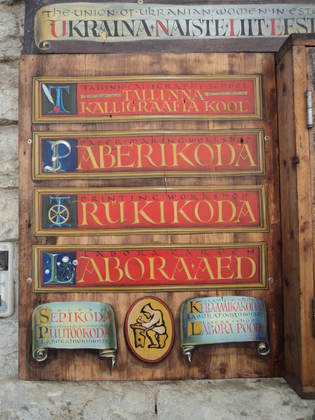 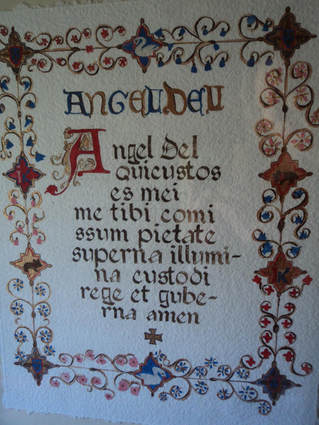 |
Canberra Calligraphy Society Inc.
Like-minded people with a passion for calligraphy. Archives
January 2020
Categories
All
Inspirational People & Places
Gemma Black |

 RSS Feed